Conservation of school poster from spanish civil war period
It’s now some years since I restored this map, but I feel like sharing it anyway.
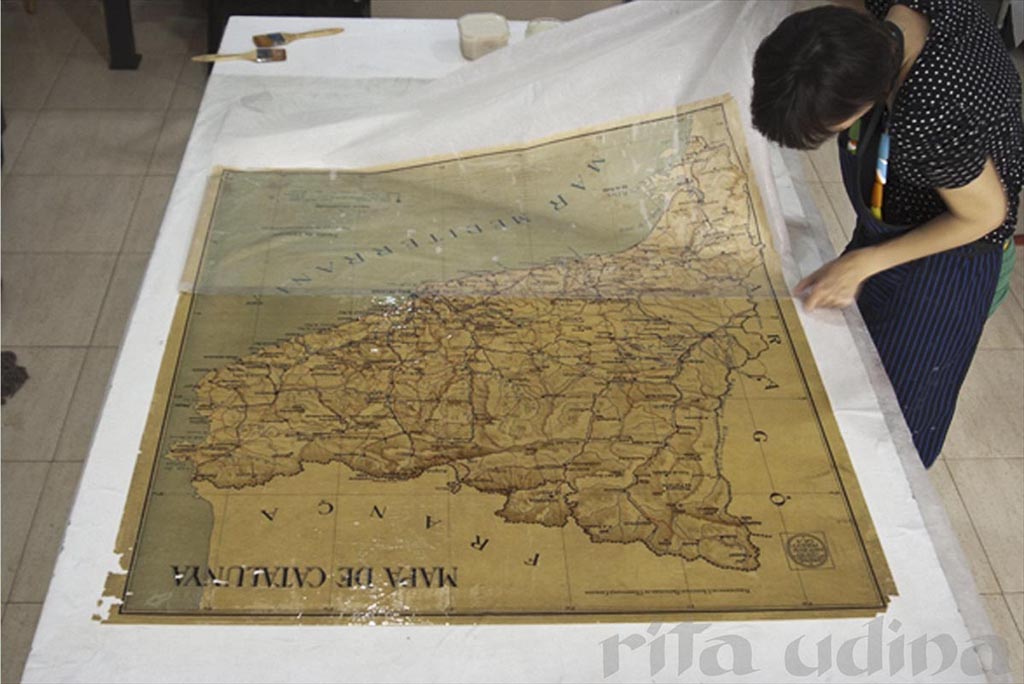
This map represents the typical school posters: with its wooden slats to roll and hang, lined on the back. It was very common to varnish them with shellac to waterproof and protect them from abrasion. This one was made of two pieces of printed paper, sticked together along the central horizontal stripe. It is from 1936, spanish civil war was barely breaking.
It has been restored on the initiative of Sabadell Municipal Museums, with the exhibition Made in Sabadell.
 The main degradation was the varnish layer (shellac) which causes cracks and dries paper fibres. At the end this oxidizes and turns yellow the object. Its relatively large scale (121 x 117 cm) does not help on its conservation either.
Removing the old varnish has allowed to repare other minor damages: tears, gaps and wrinkles. But most important is that the new varnish is not oxidizing nor yellowing. As it is very flexible it will not crack in the future.
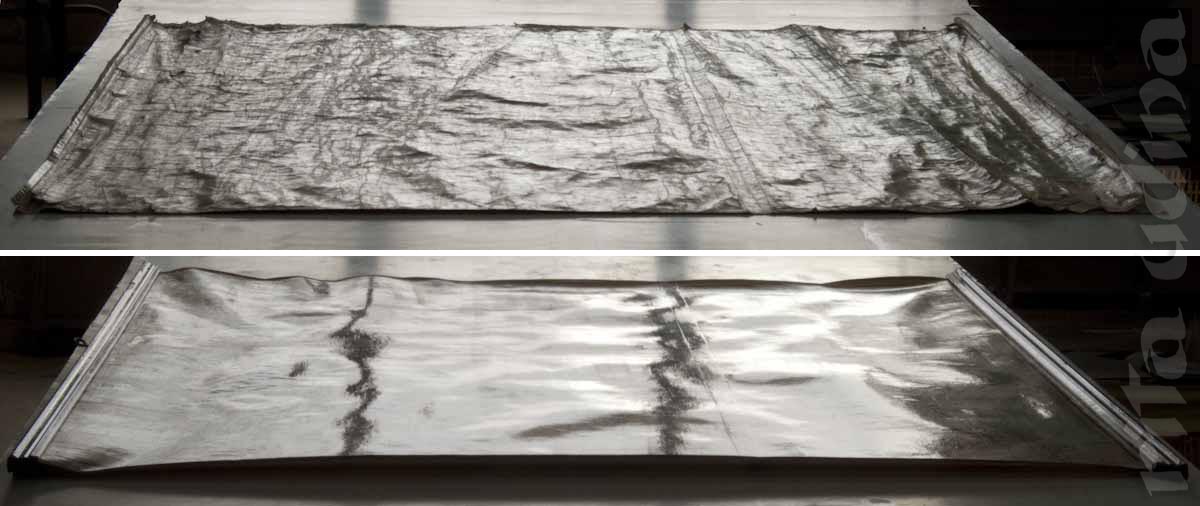
 Countless microfissures eroded the formerly smooth surface of the printed paper. The image above, raking lighted, shows how the removing of the original varnish allowed to hydrate the paper again, restoring its elasticity.
Damp stains were also a minor damage (in terms of physical and chemical stability of the object), though at first glance they were very annoying. Once they were cleaned, tha map can be best enjoyed. Micro cracking of the varnish affected the clarity of the work, dampening colours and blurring lines. After the old varnished has been removed, colours recover intensity and definition.
The restoration has eliminated harmful aspects and healed the main damages, respecting the map’s original characteristics and appearance: gloss, presentation with the wooden slats, cloth on the back and ribbons. The products applied are reversible and long term preservation.
How we did it:
- Removing the canvas from the back.
- Separation of the two printed paper pieces.
- Water cleaning and deacidification. Yes, the papers are washed in water!
- The two separate parts of the map, clean and without varnish, that has been removed by immersion too.
- Sizing, consolidation of tears and gaps.
- Adding tissue reinforcement on the reverse (japanese paper lining).
- Retouching gaps on the front.
- Varnishing.
- Mounted on canvas, slats and ribbons.
Conservators: Marina Carbonell and Rita Udina.


